
Wiper Blade Installation Video Generator: Turn Fitment Data Into Buyer Guides

Summarize with
Summary
Learn how ecommerce sellers can turn vehicle fitment tables and adapter types into clear wiper installation videos, with a scalable workflow for fewer buying errors.
By adsturbo.ai | Published 2026-10-31 | Updated 2026-10-31
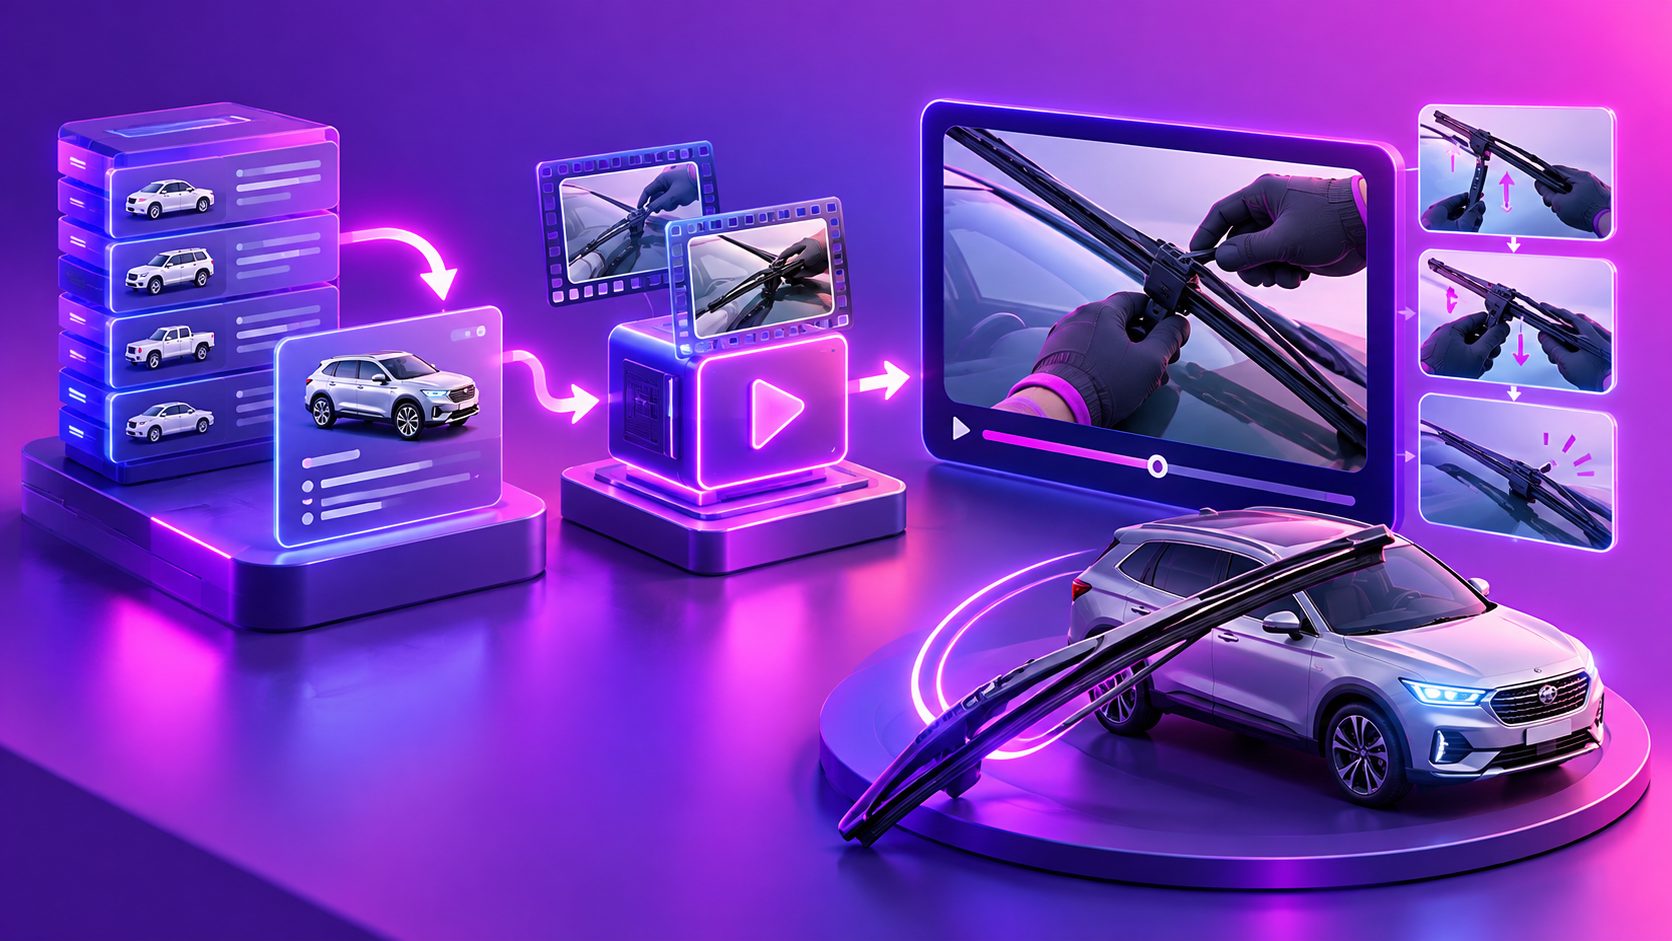
A wiper blade installation video generator helps automotive ecommerce sellers convert fitment data, vehicle applications, adapter types, and installation instructions into short buyer-guidance videos. The strongest workflow does more than show how to attach a blade: it connects the buyer’s year, make, model, arm style, and product choice to the exact installation path.
For independent auto-parts stores, this can make product education more useful before checkout and reduce confusion after delivery. Many leading wiper retailers already organize installation content by vehicle or arm type, while some provide short videos of roughly one minute for each installation style. (wipertechsupport.zendesk.com)
What is a wiper blade installation video generator?
A wiper blade installation video generator is a tool or workflow that turns product information and visual assets into instructional videos for replacing windshield wipers. It can combine product photos, reference footage, scripts, captions, voiceovers, and platform-specific formats.
For ecommerce sellers, the useful output is not a generic “how to install wipers” clip. It is a fitment-aware buying guide that answers four questions:
- Does this blade match the vehicle?
- Which connector or adapter does the vehicle use?
- What should the customer remove or unlock?
- How can the customer confirm the blade is secured?
This distinction matters because wiper arms vary. Common connection styles include J-hook, pinch tab, top button, side pin, bayonet, and other manufacturer-specific designs. Retail installation libraries often separate videos by these connector categories rather than relying on one universal tutorial. (windshieldwipers.com)
Why fitment data should come before video production
A product video can be visually polished and still fail if it demonstrates the wrong adapter. The first production step should therefore be a structured fitment table, not a script.
Create one row for each product or vehicle group with fields such as:
| Field | Example use |
|---|---|
| Vehicle year | Separates model generations |
| Make and model | Routes the buyer to the correct product |
| Front or rear position | Prevents mixing blade applications |
| Blade length | Supports product selection |
| Arm or connector type | Determines the installation sequence |
| Adapter included | Explains what the customer should use |
| Key caution | Covers hidden clips or release tabs |
| Final check | Confirms secure attachment |
This table becomes the content map for the video library. It also gives your team a way to identify where one video can serve multiple fitment rows and where a dedicated clip is safer.
A useful internal rule is: group by installation behavior, not only by vehicle name. If several vehicle models use the same 19 mm top-button connector and the same adapter release motion, they may share an instructional sequence while still displaying different fitment labels.
The “Fitment-to-Frame” video framework
A practical way to scale production is to divide every video into five frame groups. This framework adds value beyond a generic product demo because each group has a clear job in reducing buyer uncertainty.
1. Match frame
Open with the vehicle application and blade position:
- “For 2018–2022 [vehicle model], driver-side front”
- “Check your year, make, model, and blade position”
- “Confirm the connector shown matches your wiper arm”
This prevents viewers from treating the video as universal advice.
2. Connector frame
Show the arm end in a close-up before removing anything. Use a visual label such as “J-hook,” “pinch tab,” or “top button.”
The connector should be large enough to recognize on a phone screen. If the adapter is difficult to distinguish, add a freeze frame, arrow, or short caption rather than moving immediately into the installation.
3. Removal frame
Demonstrate the release action with minimal camera movement:
- Lift the arm carefully.
- Support the arm so it cannot strike the glass.
- Press, slide, or unlock the connector.
- Remove the old blade.
Safety language is important here. Installation guidance from automotive and wiper brands commonly warns users to control the bare arm and follow the product-specific removal method. (hyundaihowtos.com)
4. Installation frame
Show the new adapter and blade from the same angle used in the connector frame. A buyer should be able to compare the old and new parts without guessing which side faces upward.
Use captions for the physical confirmation:
- “Slide until the locking tab clicks”
- “Pull gently to confirm the blade is retained”
- “Keep the protective cover on until installation is complete”
Do not imply that every adapter installs identically. Your script should pull the correct instruction from the fitment row.
5. Verification frame
Finish with a concise check:
- Confirm the blade sits flat against the windshield.
- Lower the arm carefully.
- Test the wipers at low speed.
- Stop if the blade shifts, rattles, or does not wipe evenly.
Some installation resources recommend operating the wipers at different speeds after fitting to confirm that the blade is secure. (scrubblade.com)
How to create these videos at scale with AdsTurbo
AdsTurbo can support an ecommerce production workflow built around product images, reference videos, and structured selling points. Its Product Video workflow accepts JPG or PNG product images and can create UGC-style product videos, including product review, introduction, and demonstration formats.
A repeatable process looks like this:
- Prepare the source data. Export your vehicle fitment table and adapter mapping from the catalog.
- Collect visual assets. Use product photos, adapter close-ups, packaging images, and any approved reference footage.
- Write fitment-specific inputs. Include the vehicle group, blade position, connector type, key release action, and final safety check.
- Generate a base demonstration. Use a clear product explanation rather than a broad promotional script.
- Create variants. Produce different versions for TikTok Shop, product pages, paid social, and post-purchase support.
- Add captions and translations. AdsTurbo Video Subtitle can transcribe speech, generate synchronized captions, and export either a subtitled video or a separate subtitle file.
- Review the physical action. Check that the adapter, arm orientation, release motion, and final lock are visually accurate.
- Publish beside the relevant SKU. A vehicle selector, product page, QR code, or order email can route the customer to the matching video.
For a more promotional version, an Amazon listing FAQ video workflow can help turn recurring buyer questions into proof-oriented clips. For broader catalog operations, the bulk product catalog video workflow provides a useful model for organizing many SKUs and creative variants.
How to reduce wrong-video and wrong-product risk
The main operational risk is not video quality. It is mismatch.
Use these controls before publishing:
- Put the vehicle application in the opening caption.
- Display the exact connector type before the removal step.
- Keep front and rear blade instructions separate.
- Avoid saying “fits all vehicles” unless your fitment data proves it.
- Add a visible “verify year, make, and model” prompt.
- Use one video template per installation behavior.
- Store the source data and final video under the same SKU or fitment ID.
- Review the first frame and thumbnail on a mobile screen.
This approach also supports product-page search behavior. Buyers may search for “how to install a J-hook wiper,” “how to replace a top-button blade,” or “which adapter fits my car,” not just the product name. A segmented video library can answer those questions closer to the purchase decision.
What should the video length and format be?
For a product page, aim for a short, direct installation explanation. A 45–90 second clip is often enough when the connector and release action are easy to see. More complex adapters may need a separate version rather than a rushed single video.
Recommended formats include:
- 9:16: TikTok, Instagram Reels, and Shorts
- 1:1: marketplace and social feed placements
- 16:9: product pages, YouTube, and support libraries
AdsTurbo Ad Clone can analyze a reference video of up to 12 seconds and generate advertising variations, while its editing tools support subtitles, translation, upscaling, character replacement, and other video-processing workflows. Use those capabilities for creative testing, but keep the installation action tied to verified product information.
Common questions
Can one installation video cover every wiper blade?
Usually not. A general introduction can be reused, but the connector, adapter, and release action should match the relevant vehicle group.
Should the video show the exact vehicle?
When possible, showing the actual vehicle or a clearly labeled compatible application improves buyer confidence. If one demonstration covers several models, explain why they share the same connector and installation method.
Can product photos alone create an installation video?
Product photos can support a product explanation, but they may not prove the physical removal and locking steps. Use close-up reference footage or verified diagrams for actions where orientation matters.
Should captions be included?
Yes. Captions help viewers follow short instructional clips without sound and make connector names, fitment notes, and safety checks easier to retain. AdsTurbo Video Subtitle supports synchronized captions and downloadable subtitle files.
How can sellers make localized versions?
Create one fitment-approved master script, then translate the narration and captions for each market. Keep vehicle names, connector labels, and installation actions consistent during localization.
A strong automotive content system does not begin with “make more videos.” It begins with a reliable mapping between vehicle fitment, connector type, installation action, and product SKU. Once that mapping exists, a wiper blade installation video generator can turn catalog data into practical buyer guidance across product pages, support flows, QR codes, and social channels. Explore AdsTurbo’s AI video and ecommerce creative workflows to build the production layer around that structure.